One hospital blanket, three keepsakes (and you’ll still have some left)

It sat in a memory box for two years.
It was the blanket they wrapped my daughter in at the hospital, the same one every baby on the floor gets, there was nothing special about it except that it was hers. I couldn’t do anything with it, I couldn’t cut it, I couldn’t wash it, I was not throwing it away, obviously! I kept it in a memory box and every few months I would put something else in the box, a onesie I loved and wanted to save, her first footprint art project, her stats from every check up and I would wonder how to display that blanket.
If you’re reading this, I’d guess yours is in a box or the bottom of a drawer too.
Eventually I cut it. I’ve made three different keepsakes out of one blanket. I wish I realized sooner, you don’t use as much of it as you think.
I thought if I cut the blanket up that meant losing it, the idea that I am shredding it and wont have anything left, then I measured it.
A standard hospital receiving blanket is about 30x40 inches. An 8x10 inch mat took a piece of blanket roughly the size of a piece of paper. The embroidery hoop was about 7.5 inches across. The shadowbox took the largest piece and there was still half the blanket leftover.

Three keepsakes out of one hospital blanket, and I still have some sitting in the memory box in her closet. It’s still hers.
Before you cut
Take a picture. Lay it flat in good light and shoot the entire blanket, take a close up for the baby book.
Wash it (or don’t). Body oils and milk can yellow over time, washing takes care of that, but washing also takes away the smell. Decide if you want to wash, if you do: cold water, gentle detergent, and air dry flat.
Plan all your cuts before grabbing the scissors. This is the thing I wish I could redo. I cut for one project before I came up with ideas for the other two and had to work around what I had. Use a pencil to mark where you need to cut first. Cut from the edges inward to keep the rest of the blanket intact.
Cut clean. Make sure you have sharp fabric scissors or a rotary cutter. If the fabric frays, don’t worry, all of the edges end up hidden behind a frame, mat or hoop.
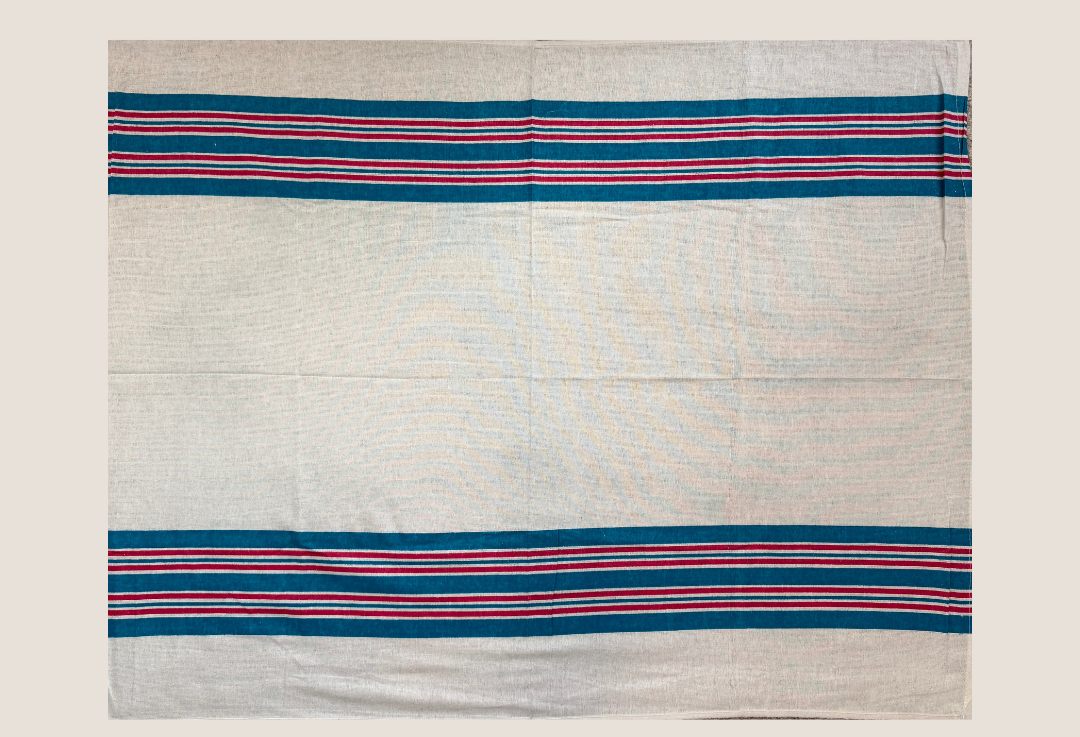
Know what you’re working with
The classic hospital blanket is typically a thin cotton flannel. They will fray when cut, just make sure to pull it taut when cutting to minimize the fray. This one works perfectly with a mat, hoop or shadow box.
Muslin swaddles are usually gauzy and very lightweight. This would work with a frame but might get distorted in a hoop.
Waffle knit or jersey stretch and sag overtime, I would not recommend for these keepsake projects.
Fleece and heavy knits are too bulky for a shallow picture frame or embroidery hoop but would work with a deep shadow box.
Some links in this article are affiliate links, which means I earn a small commission through them, at no cost to you.
What I made
Matted picture frame with their first picture
My favorite of the three, and it’s so easy! The blanket wraps around the mat and the picture in the middle is one of the first pictures of her at the hospital and she’s wrapped in the same blanket.
I had an extra white, 11x14 inch picture frame laying around with an 8x10 mat and a 4x6 picture (I recommend using a 5x7, I just used what I had on hand). I laid the blanket flat and placed the mat on top to see how much of the blanket I was working with. Once I cut the blanket I centered the mat over the cut and held them up in front of a window to make sure the lines were straight. Once I had positioning, I placed a heavy book on one side and pulled the other side taut as I used hot glue on the mat and pulled the mat over the glue, pressing firmly until it set. I essentially wrapped the blanket around the mat like a present. Once it was wrapped I cut the inside of the mat diagonally and trimmed it to fit and wrap completely around the mat.
After the mat was done I found some paint in my closet that closely matched the red stripe on her blanket. I admit I did no prep to the frame and did a sloppy job painting, if I could go back I would sand the frame to give it a little something for the paint to adhere to and do better painting (as I’m sure you’re aware finding time to do crafts with little ones around is tough). The paint was dry, the mat and photo were in the frame, then I grabbed a scrap piece of blanket and tied it in a bow and hot glued it to the top of the frame.
This turns a plain frame into a focal piece for your nursery or hallway.

Size of blanket used: about a sheet of paper.
Cost: Low.
Supply list:
Best for: anyone with a hospital blanket and photo.
Embroidery Hoop
The easiest of the three, and the first one I did.
Lay your hoop on the blanket and cut a square slightly larger than the hoop. I used a 7.5 inch hoop, so I cut about an 11x11 inch square. Center your blanket over the inner ring, press the outer ring over it, then tighten the screw gradually while pulling around the hoop to ensure there is tension, don’t pull too tight or the stripes will appear warped.
Trim the excess fabric around the back of the hoop, if you want, you can run a loose stitch around to pull it. I did not do that.
Lastly, I used a chiffon ribbon, cut to the length of my baby when she was born, tied it in a bow and used my Cricut to cut out her name and birth date to iron on the ribbon, hot gluing it to the hoop.

Size of blanket used: about an 11x11 inch square for a 7.5 inch hoop.
Cost: Low.
Supply List:
Best for: Flannel or cotton hospital blankets.
Shadow Box
The first two keepsakes are just the blanket, but this is for everything else that is sitting in the box in your closet. Hospital bracelets, hat, hello world sign, birth announcement, first pictures, ribbon from flowers, balloons, dried flowers, whatever you want to display.
Use the blanket as the backing for the shadow box, then pin all of those keepsakes against their blanket, that makes it a keepsake rather than a display case.
This will use the largest piece of blanket, do this one last, size it with what you have after the previous projects.
I used an 11x14 shadowbox frame with 1 inch of depth. Using the same technique as the mat above, I wrapped the backing like a present with the blanket, hot gluing around the edges to keep it in place. I used sewing pins to keep everything from shifting. The most important part is playing with the layout and depth before adhering to anything permanently. For flatter items such as bracelets, pictures, and birth announcements I used glue tape. Again, I measured a piece of ribbon to her birth height and tied it in a bow as an added detail.
Don’t go crazy trying to stuff everything into the shadowbox, it will look cluttered and messy instead of collected and purposeful. Pick the things that matter most and let the rest stay in a box, you could always switch things out later.

Size of blanket used: about a 14x18 inch piece
Cost: Medium
Supply List:
Best for: Anyone who kept the whole bag, not just the blanket.
What to do with the rest?
The other half of the hospital blanket is folded with acid free tissue paper in a keepsake box in my daughter's closet. This keeps it out of extreme temperatures and safe from any yellowing.
Comments